Flatlay styling is most of the creative fun on a flatlay shoot. This is when you get to make that vision in your mind’s eye become a reality. And it’s why it’s sooo frustrating when you struggle to make your props look just how you want. This is supposed to be fun right?
Photos are rarely what they appear to be. Most of the time, the props in your set can use a little extra umph to make them really sing. There are countless little tricks and secrets that professional stylists use to add that touch of magic to every set they style, but I’ve found a few favourite tricks that I use all the time in my flatlays.
Want to give your flatlays that extra little umph? Read below to learn my top 5 flatlay styling hacks.
Flatlay Styling Hack #1: Sticky Tack
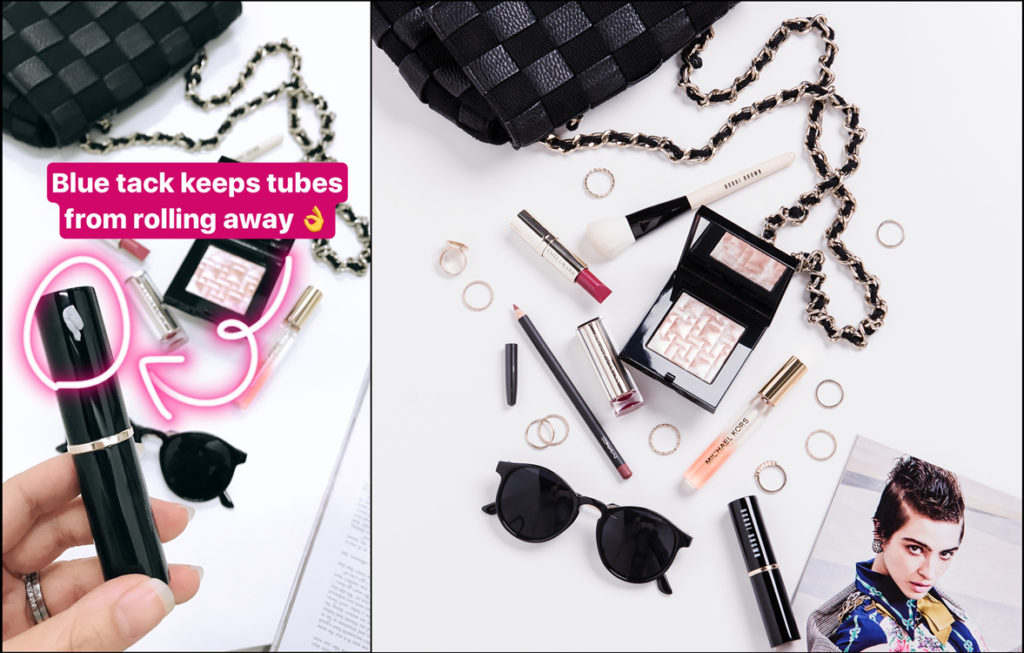
Sticky tack, or blue tack, is one of my favourite little helpers on all of my flatlay shoots. If you’ve never used it before, sticky tack is a puddy-like substance that sticks to most surfaces, but can be removed without leaving a trace.
It comes in handy all the time for many reasons:
- Keeping pens or lipstick tubes from rolling away
- Angling sunglasses to sit perfectly
- Elevating flat cards off backgrounds to create more depth and separation
- Wrangling purse straps or handles so they stay in place
The list of tasks sticky tack can handle is endless. Plus, it’s cheap, reusable, and easy to find at most discount and office supply stores.
Flatlay Styling Hack #2: Stuff It
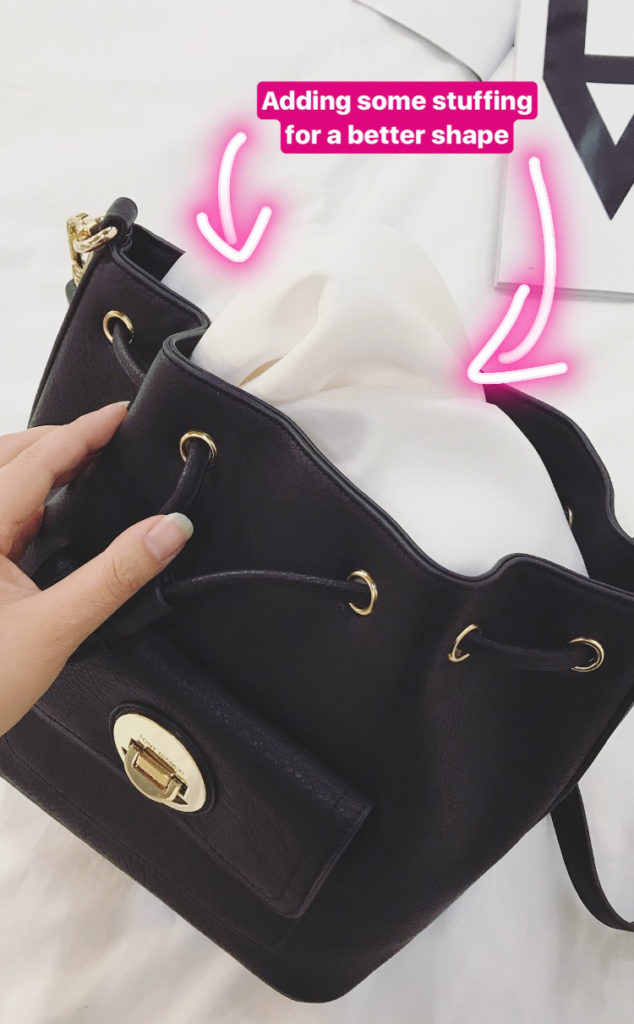
Crumpled bags and clothes in flatlays can look lifeless. Try adding stuffing to give them more shape.
Bubble wrap or small towels work great for bags. The trick is to use more than you think you’ll need. Add the stuffing to the corners of your bag first and then fill in the rest.
Laying clothes flat can look too flat which is another word for boring. Don’t be afraid to try adding a little tissue paper under that shirt or jumper. It’ll create volume and separate your clothes from the background. If your clothes look too messy or dominate your set, try folding them neatly and adding stuffing to any section that looks uneven or lumpy.
Flatlay Styling Hack #3: Watch Your Reflections
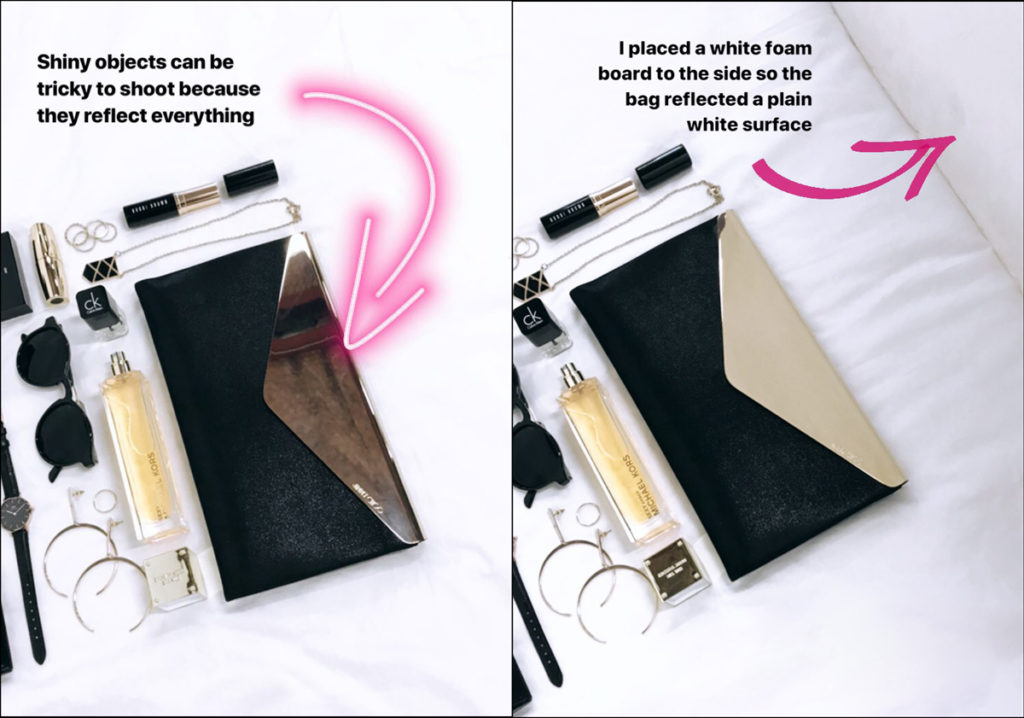
Have you seen how sometimes your makeup palette or bottle of perfume looks dull in your final shot? There are tons of reflective surfaces in cosmetics so this tip is especially important for anyone who likes to shoot beauty products. Sunglasses, bag clasps, and anything shiny will offer the same problem.
Shiny surfaces behave like mirrors. To make shiny surfaces look clean and attractive, look at what those shiny surfaces are reflecting. Placing a white board at the correct angle will clean up those reflections and take them from dull to luxe.
Flatlay Styling Hack #4: Break Props Down Into Smaller Parts
Can’t find enough props to fill your set? Look at the props you’ve gathered – you may already have enough if you get creative with how you use them.
Break up the components of your props to create more props that already fit the style of your flatlay. Some examples:
- Separate pens from their caps or lids from bottles
- Break food into smaller pieces or use the crumbs as another element
- Pull off petals or leaves from flowers
- Separate cups from saucers
Using the different parts of one prop will give you more items to play with in your composition while making it less likely you’ll clutter your flatlay with too many items that don’t belong together.
Flatlay Styling Hack #5: Group Props Together To Declutter Your Set
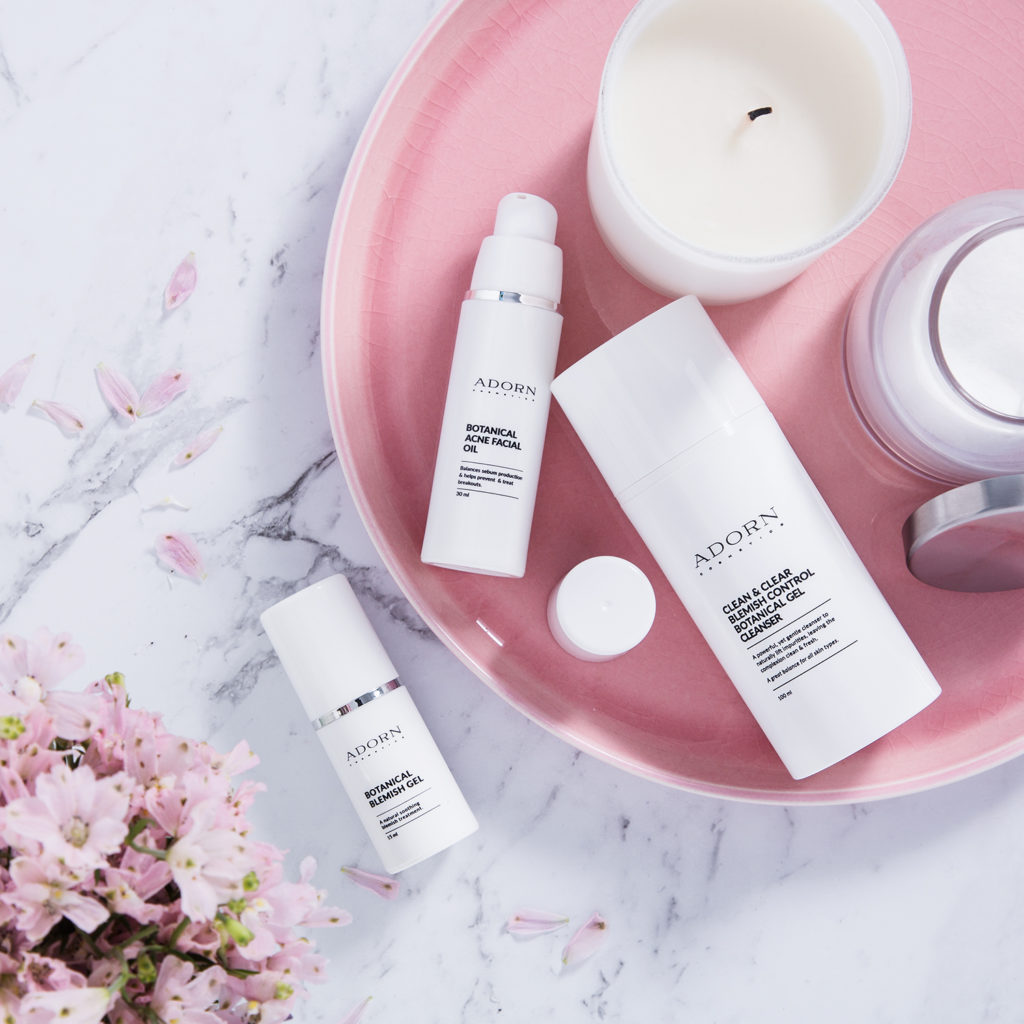
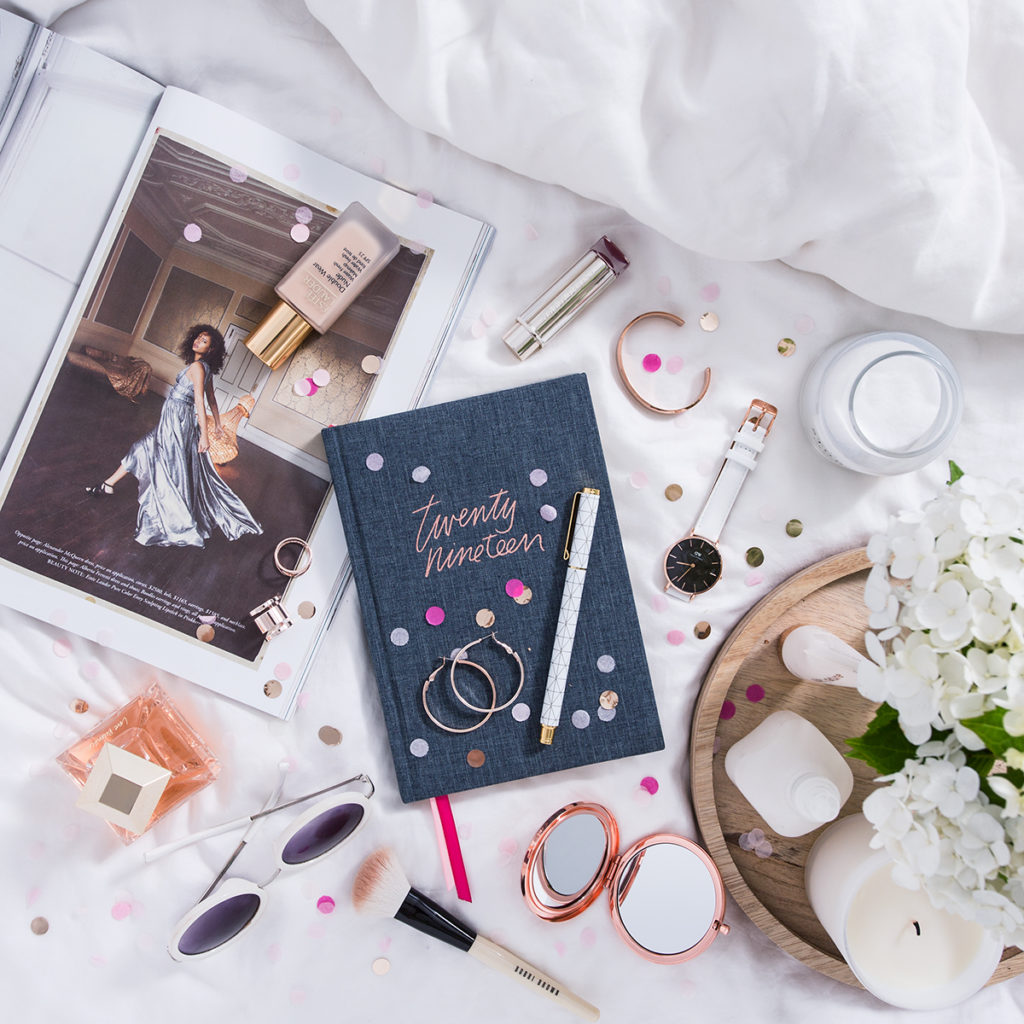
Sometimes flatlays can look messy or cluttered when you have too many props in your scene. Pull small groups of props together to visually make them look like a single unit instead of lots of separate items.
How can you do this?
- Place several items on a tray or plate
- Overlap items so they read as a pair or set (think earrings, rings, utensils, etc)
- Stack clothes, books or magazines so they look like one pile
Grouping props together is the secret to making a full and detailed flatlay not look overly messy or cluttered.
Be A Problem Solver
When you’re styling, always ask yourself why a prop doesn’t look good to you. Styling is really just problem solving. And it’s easier to solve a problem when you can identify what that problem is in the first place.
It takes a lot of practice to get the hang of flatlay styling. The more experience you gain playing around with props, the more you’ll improve your skills at manipulating them on your set. So the next time you get frustrated putting your flatlay together, try not to give up too quickly. Keep playing around and keep trying to solve those problems. The more you keep at it, the better (and faster) you’ll become.
- C xx


